Stop Eyeballing It: Excel Add Margin Formulas Made Easy

Why Getting Your Margin Formula Right in Excel Can Make or Break Your Pricing
If you’ve ever wondered how to add margin in Excel formula, here’s the quick answer:
To calculate a selling price from a cost price using a target margin:
Selling Price = Cost ÷ (1 − Margin %)
For example, in Excel with cost in cell A2 and margin percentage in cell B2:
=A2/(1-B2)
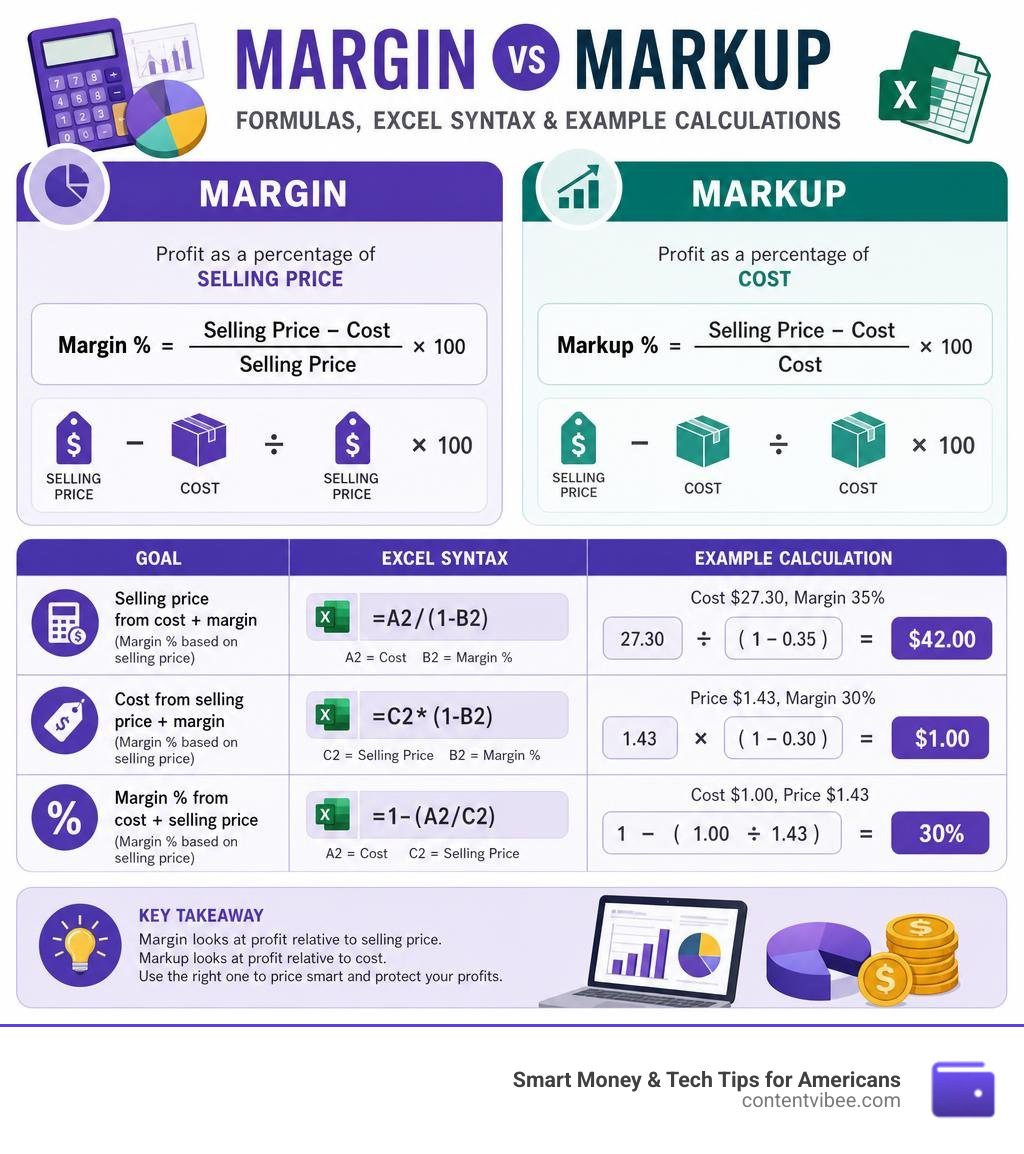
The three core margin formulas in Excel:
| Goal | Formula | Example |
|---|---|---|
| Selling price from cost + margin | =A2/(1-B2) |
Cost $27.30, 35% margin → $42.00 |
| Cost from selling price + margin | =C2*(1-B2) |
Price $1.43, 30% margin → $1.00 |
| Margin % from cost + selling price | =1-(A2/C2) |
Cost $1.00, price $1.43 → 30% |
Pricing mistakes are expensive. And one of the most common mistakes business owners make is confusing margin with markup — then building the wrong formula into their spreadsheet.
According to data from NYU Stern School of Business, the average gross profit margin across all industries is 36.28%. Online retailers average even higher, at 42.78%. If your Excel formulas are built on the wrong math, you could be leaving serious money on the table — or worse, unknowingly selling at a loss.
The good news? Once you understand the core formula logic, Excel makes margin calculations fast, flexible, and easy to update across hundreds of line items at once.
This guide walks you through exactly how to do it.
Margin vs. Markup: Why the Difference Matters for Your Bottom Line
When we sit down to price our products or services, we often hear the terms “markup” and “margin” used interchangeably. However, in accounting and corporate finance, mixing these two up is a recipe for shrinking profits.
To understand why, we have to look at how each metric relates to gross profit, revenue, and cost of goods sold (COGS).
Gross profit is the money you make after subtracting the cost of producing your goods or services from your revenue.
- Margin (specifically gross profit margin) is your gross profit expressed as a percentage of the selling price (revenue). It answers the question: “For every dollar we bring in, what percentage do we keep as profit?”
- Markup is the percentage increase you add to your cost price to determine the selling price. It answers the question: “By what percentage did we increase our cost to get our price?”
Let’s look at a real-world scenario to see how this difference plays out. Suppose your cost of goods sold is $100, and you want to make a 25% profit.
If you use a markup approach, you simply add 25% of the cost to your price:
$100 * 1.25 = $125.
At a $125 selling price, your gross profit is $25. But look at your actual profit margin:
$25 profit ÷ $125 selling price = 20%.
By using a markup formula instead of a margin formula, you missed your target margin by a full five percentage points! To achieve a true 25% margin, your selling price must be $133.33.
To help clarify the differences, let’s look at how these two concepts compare in practice:
| Metric | Mathematical Definition | Excel Formula Syntax | Real-World Use Case |
|---|---|---|---|
| Profit Margin | Profit divided by Selling Price | =(Price-Cost)/Price |
Used by executives and investors to measure overall profitability and financial health. |
| Markup | Profit divided by Cost | =(Price-Cost)/Cost |
Used by purchasing managers and retail buyers to quickly apply a standard percentage increase to wholesale costs. |
If you want to dive deeper into how these costs affect your business, check out our guide on Gross Margin Cost Demystified For Small Businesses.
How to Add Margin in Excel Formula: Step-by-Step Guide
Now that we know the math behind true margins, let’s look at how to build this formula inside Microsoft Excel.
To calculate the selling price when you know the cost price and the desired margin percentage, the standard algebraic formula is:
Selling Price = Cost / (1 – Margin Percentage)
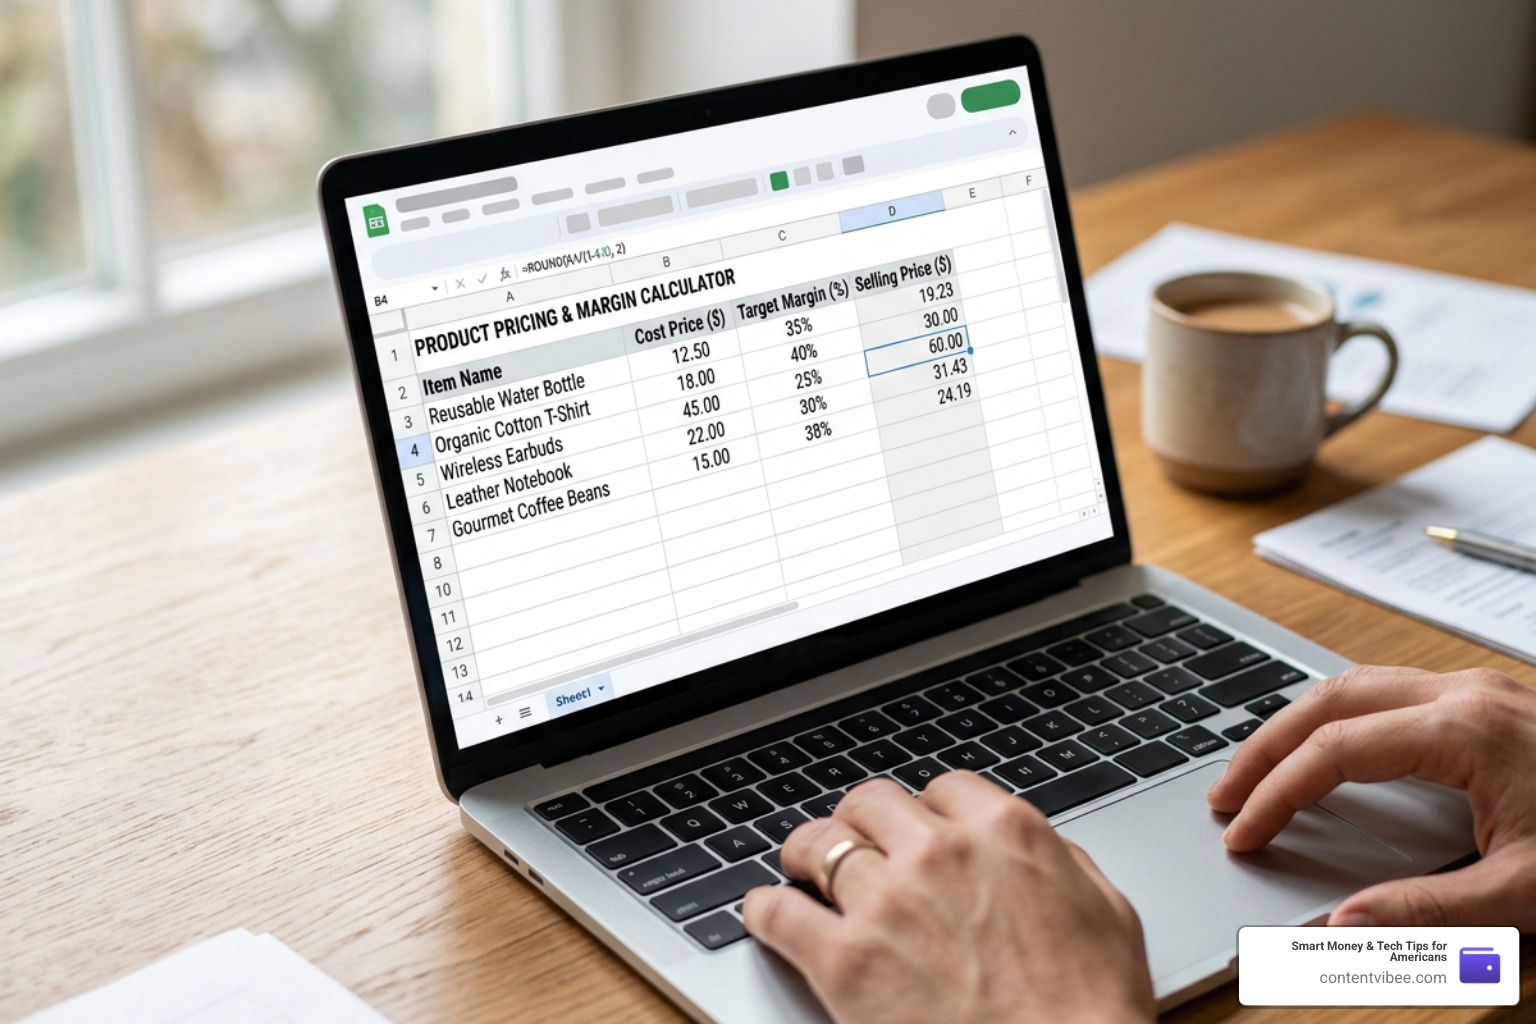
Let’s build a clean, professional spreadsheet using this logic.
Step 1: Set Up Your Columns
Open a new Excel worksheet and set up your headers in row 1:
- Column A: Item Name
- Column B: Cost Price
- Column C: Target Margin %
- Column D: Selling Price
Step 2: Enter Your Data
In row 2, enter your first item’s details. Let’s say you sell custom retail items:
- Cell A2: Handcrafted Leather Bag
- Cell B2: 27.30 (your wholesale cost)
- Cell C2: 0.35 (which formats as 35% when you click the % button on your Home tab)
Step 3: Enter the Margin Formula
In cell D2, enter the following formula:
=B2/(1-C2)
Press Enter. Excel will calculate the selling price as $42.00.
If you want to verify the math:
- Profit = $42.00 – $27.30 = $14.70
- Margin = $14.70 / $42.00 = 0.35 (35%)
The math is flawless. If you have multiple items, you can double-click the fill handle (the tiny square in the bottom-right corner of cell D2) to copy the formula down your entire sheet. For instance, if you have another item with a cost of $11.45 and a 35% margin in row 3, copying the formula down will instantly calculate the correct selling price of $17.62.
For more community discussions and troubleshooting on this specific formula, you can read the Add margin formula? – Microsoft Q&A thread.
How to Add Margin in Excel Formula Using a Fixed Reference Cell
In real-world business scenarios, you rarely want to type the target margin on every single row. What if you decide to run a holiday promotion and want to see the impact of dropping your margin across all line items from 35% to 30%?
If you hardcode the margin into every row, you will spend your afternoon manually updating cells. Instead, we can use an absolute reference to create a dynamic pricing model.
By placing your target margin in a single, dedicated cell, you can update your entire inventory pricing with one keystroke.
Here is how to set it up:
- Place your global target margin in cell B1. Let’s enter
35%. - Set up your itemized data starting in row 3. Put your wholesale costs in Column A (starting at A3).
- In cell C3, enter the following formula:
=A3/(1-$B$1)
Notice the dollar signs in $B$1. This is called an absolute reference. You can easily add these dollar signs by typing B1 in your formula bar and pressing the F4 key on your keyboard.
When you drag this formula down Column C, the reference to the cost cell (A3) will automatically change to A4, A5, and so on. However, the reference to cell B1 remains locked in place.
If you change the value in cell B1 to 40%, every single selling price in your sheet will instantly recalculate to reflect the new 40% margin. This is an incredibly powerful tool for running “what-if” scenarios during budget planning.
For a broader look at how Excel handles these types of calculations, check out the Overview of formulas in Excel | Microsoft Support page.
How to Add Margin in Excel Formula to Calculate Cost from Selling Price
Sometimes, retail math requires us to work backward. Let’s say you are negotiating with a major distributor who insists that your product must retail for exactly $1.43 to remain competitive on store shelves. If your business requires a strict 30% profit margin to cover overhead, what is the maximum cost price you can afford to pay your manufacturer?
This is known as finding the reverse margin. To calculate your maximum cost, the formula is:
Cost = Selling Price * (1 – Margin %)
Let’s build this in Excel:
- In cell A2, enter your fixed selling price:
1.43. - In cell B2, enter your target margin:
30%. - In cell C2, enter this formula:
=A2*(1-B2)
When you press Enter, Excel will calculate your maximum allowable cost as $1.00.
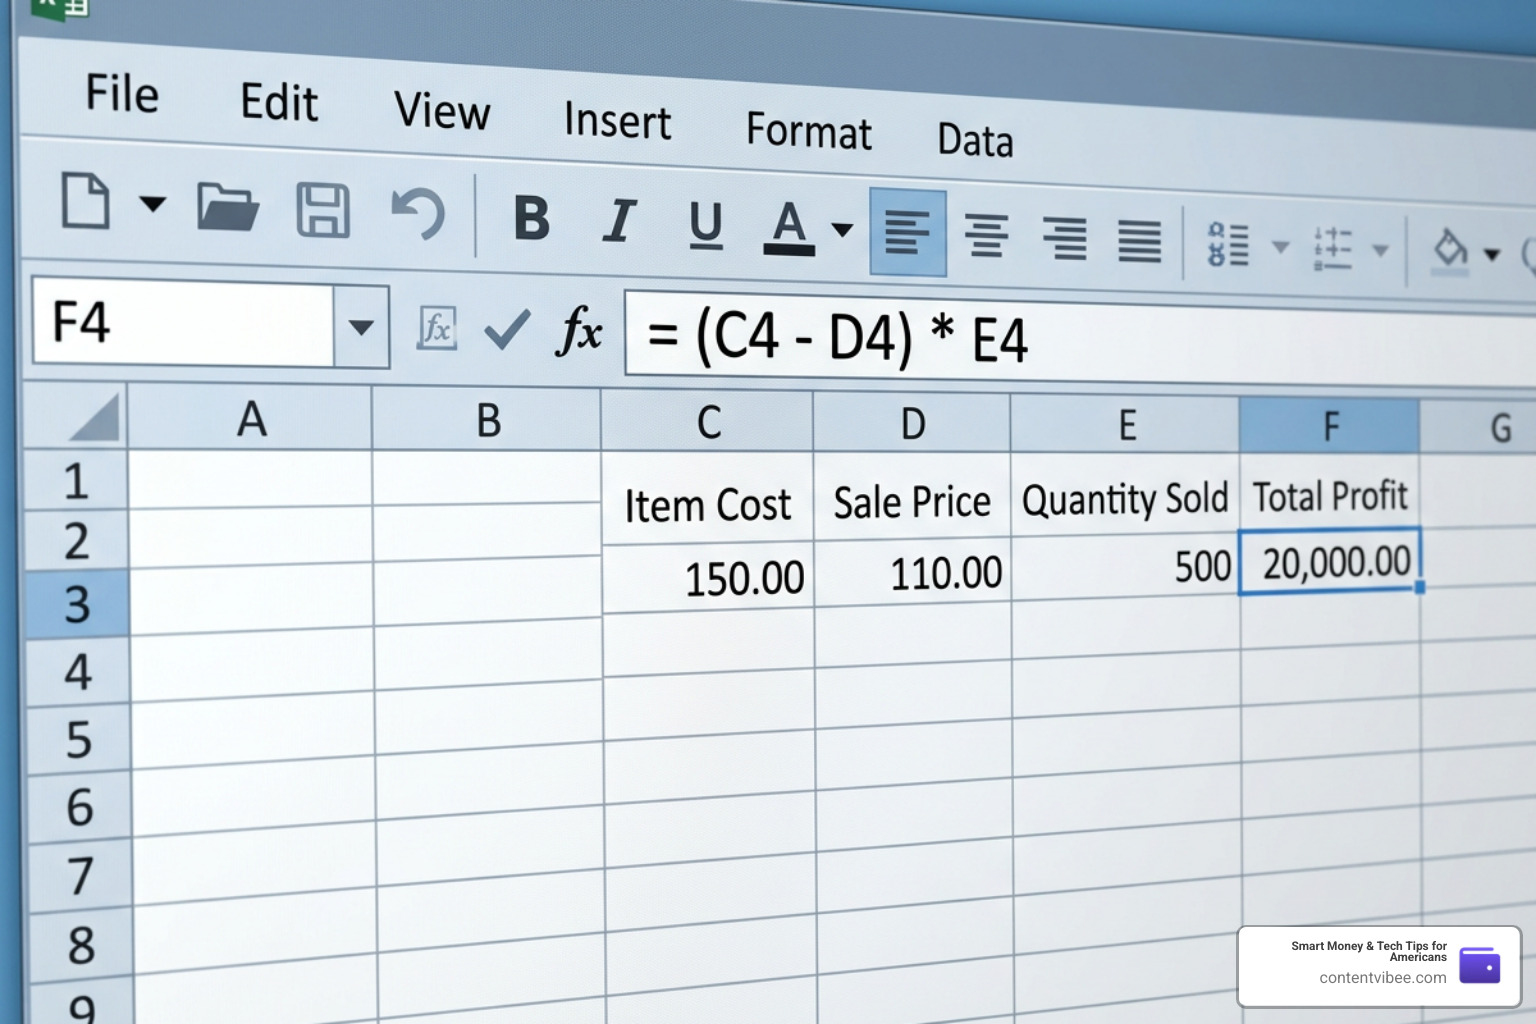
This calculation is vital when planning discount pricing structures. If you know your retail price and want to offer temporary discounts while maintaining a baseline profit margin, this formula keeps your margins safe from unexpected dips.
Advanced Techniques: Creating Reusable Margin Calculators in Excel
If you find yourself building these formulas repeatedly, it is time to upgrade your workflow. Creating reusable margin calculators not only saves time but also reduces the risk of manual entry errors across your team.
For professional financial planners and CPAs, having a standardized toolkit is essential. If you want to dive deeper into professional financial tools, take a look at our specialized resource: Margin Calculator For Accountants Stop Undercharging And Start Multiplying Your Profits.
Below, we will explore two advanced methods to create custom, reusable margin functions in Excel: using the modern LAMBDA function and writing a classic VBA User Defined Function.
Building a Custom Margin Function with LAMBDA
If you are using a modern version of Excel, you have access to one of the most powerful formula features ever released: the LAMBDA function.
LAMBDA allows you to build your own custom Excel functions without writing a single line of VBA code or saving your workbook as a macro-enabled file. It is clean, secure, and incredibly easy to share.
Let’s build a custom function called ADD_MARGIN that takes a cost and a margin percentage and outputs the correct selling price.
First, let’s test the formula syntax in a standard cell:
=LAMBDA(cost, margin, cost/(1-margin))(A2, B2)
If this test returns the correct selling price, we are ready to save it to our workbook’s Name Manager:
- Copy the formula text:
=LAMBDA(cost, margin, cost/(1-margin))(do not copy the test cell references at the end). - Go to the Formulas tab on the Excel Ribbon.
- Click Name Manager, then click New.
- In the Name field, type:
ADD_MARGIN - In the Refers to field at the bottom, paste your copied LAMBDA formula.
- Click OK, then close the Name Manager.
Now, your custom function is saved directly inside the workbook. You can use it in any cell just like a native Excel function:
=ADD_MARGIN(A2, B2)
To learn more about how to unlock the full power of custom functions, check out the official LAMBDA function | Microsoft Support guide.
Automating Margin Calculations with VBA User Defined Functions
While LAMBDA is perfect for standard workbooks, legacy systems or complex enterprise environments often rely on Visual Basic for Applications (VBA) to build custom tools.
By writing a quick User Defined Function (UDF) in the VBA Editor, you can make your custom margin calculator available across your entire Excel application.
To build your first margin UDF, follow these steps:
- Open your Excel workbook and press
Alt + F11to launch the VBA Editor. - In the top menu, click Insert > Module.
-
In the blank module window, paste the following code:
-
Close the VBA Editor and return to your spreadsheet.
- Save your workbook as an Excel Macro-Enabled Workbook (
.xlsm) so your code is preserved.
Now, you can use your brand-new custom function in any cell:
=CalculateSellingPrice(A2, B2)
This custom function even includes basic error handling to prevent division-by-zero errors if someone accidentally enters a margin of 100% or higher.
For a comprehensive comparison of building custom tools using both modern and classic methods, read our guide on how to Create a User Defined Function in Excel (VBA & LAMBDA).
Frequently Asked Questions about Excel Margin Formulas
How do you calculate margin percentage if you know cost and selling price?
To find your actual margin percentage when you already know both your wholesale cost and your final retail price, you must use the margin percentage formula:
=(Selling Price - Cost) / Selling Price
In Excel, if your cost is in cell A2 and your selling price is in cell C2, your formula will be:
=(C2-A2)/C2
Once you enter this formula, make sure to select the cell and format it as a percentage.
A quick warning: do not forget the parentheses! According to the rules of mathematical operator precedence, Excel performs division before subtraction. If you write the formula as =C2-A2/C2 without parentheses, Excel will divide your cost by your selling price first, then subtract that decimal from your selling price, resulting in a wildly incorrect number.
To brush up on how Excel handles mathematical logic, check out the guide on Calculation operators and precedence in Excel – Microsoft Support.
What is the difference between page margins and profit margins in Excel?
If you search for “margins in Excel,” you will find two entirely different topics: profit margins (the financial calculations we have discussed in this guide) and page margins (the blank space around the edges of a printed spreadsheet).
If you are preparing a financial report for a big presentation and need to adjust how your spreadsheet looks on physical paper or a PDF, you are dealing with print layout margins. You can easily adjust these settings by going to Page Layout > Margins on the Excel Ribbon, where you can select presets like Normal, Wide, or Narrow, or set custom values.
For a complete step-by-step walkthrough on preparing your financial sheets for clean printing, see How to Change Page Margin in Excel.
How do I convert markup to margin in Excel?
If your suppliers or industry peers talk in terms of markup, but your internal accounting requires you to report in profit margins, you can easily convert markup to margin using this formula:
Margin = Markup / (1 + Markup)
In Excel, if you have your markup percentage (e.g., 50% or 0.50) stored in cell A2, you can convert it to a true profit margin using this formula in cell B2:
=A2/(1+A2)
A 50% markup will convert to a 33.3% profit margin. If you want a quick way to handle these conversions without building complex sheets from scratch, use our free Markup To Margin Calculator.
Conclusion
At Suppremo, we believe that financial accuracy is the foundation of any successful business venture. Stop eyeballing your prices or relying on simple markups that quietly drain your profitability. By mastering how to add margin in Excel formula, you gain complete control over your pricing strategy, ensuring that every sale supports your business growth.
If you are looking for a comprehensive, all-in-one tool to check your math or quickly generate pricing structures on the go, check out our interactive Omni Margin Calculator.
With the right formulas locked into your spreadsheets, you can make confident, data-driven pricing decisions that protect your bottom line for years to come. Happy calculating!